 how-to
Motorcycle Battery Replacement Tips 2026: A Step-by-Step Guide
Table of Contents
- Signs Your Motorcycle Battery Needs Replacement
- Motorcycle Battery Types: AGM vs. Conventional and Lithium-Ion Options
- What You'll Need: Tools, Safety Gear, and Compatibility Checks
- Step-by-Step Motorcycle Battery Replacement Tips 2026
- Post-Installation Testing and Verification
- Best Motorcycle Battery Brands 2026 and Selecting the Right Replacement
- How to Charge a Motorcycle Battery and Extend Its Life
- Motorcycle Battery Maintenance Tips and Storage Best Practices
- Frequently Asked Questions
Last Updated: July 26, 2026
When your motorcycle won't start, a dead battery is often the culprit. Replacing it yourself can save hundreds in labor costs, but doing it wrong risks electrical damage or injury. This guide from Bigtime Battery covers motorcycle battery replacement tips 2026 with step-by-step instructions, safety protocols, and post-installation verification that most guides skip entirely.
Signs Your Motorcycle Battery Needs Replacement
A failing battery doesn't always announce itself with a dead engine. The most obvious indicator is a slow or silent engine crank, a weak clicking sound instead of the engine turning over signals battery depletion. Watch for dim headlights or flickering instrument panel lights when the engine is off, as a healthy battery powers these consistently.
Testing battery health with a multimeter is the only way to know for certain. Set the multimeter to DC voltage with the engine off and battery disconnected. Touch the red probe to the positive terminal and black probe to the negative terminal. A healthy motorcycle battery reads between 12.4 and 12.8 volts. Anything below 12 volts means replacement is necessary.
A load tester applies electrical stress to the battery while measuring voltage drop. If voltage drops below 10 volts under load, the battery is failing internally and won't reliably start the bike.
Motorcycle Battery Types: AGM vs. Conventional and Lithium-Ion Options
Not all motorcycle batteries are the same. Understanding the differences prevents buying the wrong replacement.
Lead-acid batteries remain the most common type. These traditional batteries use lead plates submerged in sulfuric acid electrolyte. They're inexpensive and reliable but require maintenance, you'll need to check electrolyte levels periodically and ensure proper ventilation to prevent hydrogen gas buildup.
AGM (Absorbent Glass Mat) batteries are sealed lead-acid batteries where the electrolyte is absorbed into fiberglass material. This eliminates fluid checks and makes them safer for enclosed battery compartments. AGM batteries handle vibration better than conventional lead-acid, making them ideal for cruisers. They cost more upfront but last longer and require zero maintenance.
Lithium-ion batteries represent the newest category. These lightweight, high-performance batteries deliver consistent voltage and weigh 70% less than lead-acid equivalents. They provide faster cranking and better cold-weather performance, but cost two to three times more than AGM batteries.
Cold cranking amps (CCA) measure how many amps a battery can deliver at 0 degrees Fahrenheit for 30 seconds while maintaining at least 7.2 volts. Check your owner's manual for the OEM battery's CCA rating and match it with your replacement.
What You'll Need: Tools, Safety Gear, and Compatibility Checks
Gathering the right tools before you start prevents frustration and keeps you safe. A motorcycle battery replacement takes 30 to 45 minutes when you have everything ready.
Essential tools include a wrench set (usually 8mm to 12mm for battery terminal bolts), Phillips and flathead screwdrivers, a multimeter for voltage testing, and a socket set if your bike requires removing the seat or battery box.
Safety gear is non-negotiable. Wear safety glasses to protect your eyes from acid splatter. Nitrile gloves prevent skin contact with corrosion on battery terminals. Remove any metal jewelry, rings, watches, and bracelets can create a short circuit if they contact both battery terminals simultaneously.
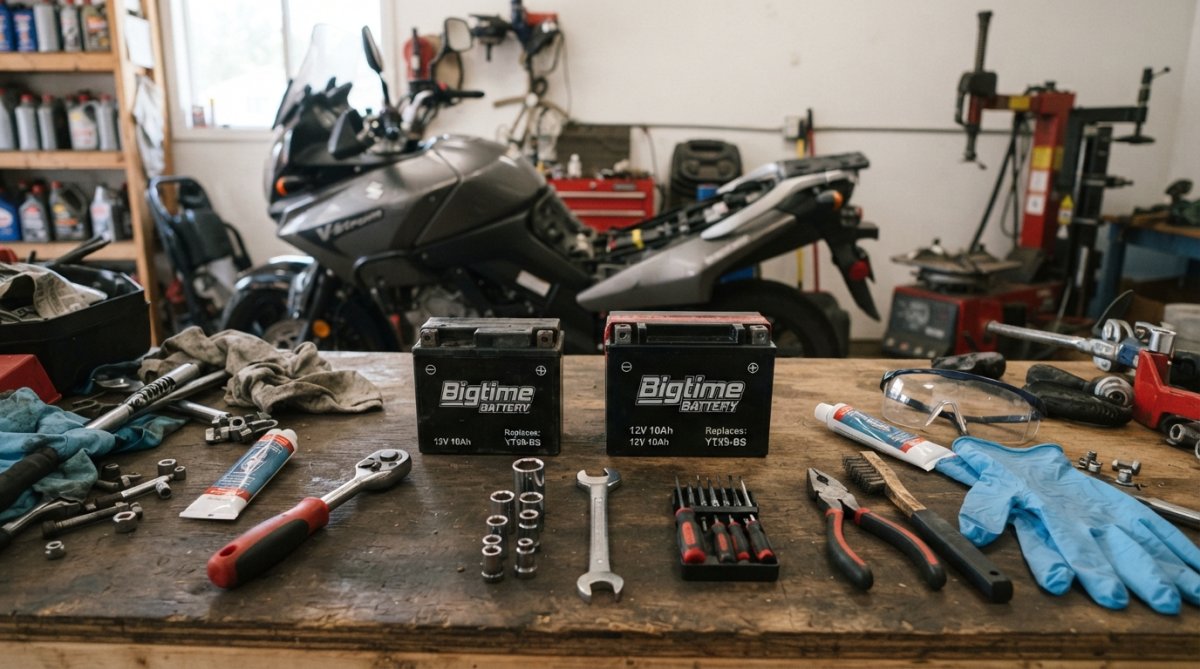
Using fitment tools to verify compatibility ensures you buy the correct battery. Measure your current battery's length, width, and height. Check your owner's manual for the OEM battery part number and specifications.
Bigtime Battery's website includes a compatibility tool where you enter your motorcycle's year, make, and model. The system displays OEM and aftermarket options that fit your specific bike. Terminal type matters too, most motorcycles use top-post terminals where cables screw directly onto the battery posts. Some bikes use side terminals, which require different cable connectors.
Step-by-Step Motorcycle Battery Replacement Tips 2026
The actual replacement process is straightforward if you follow the sequence carefully.
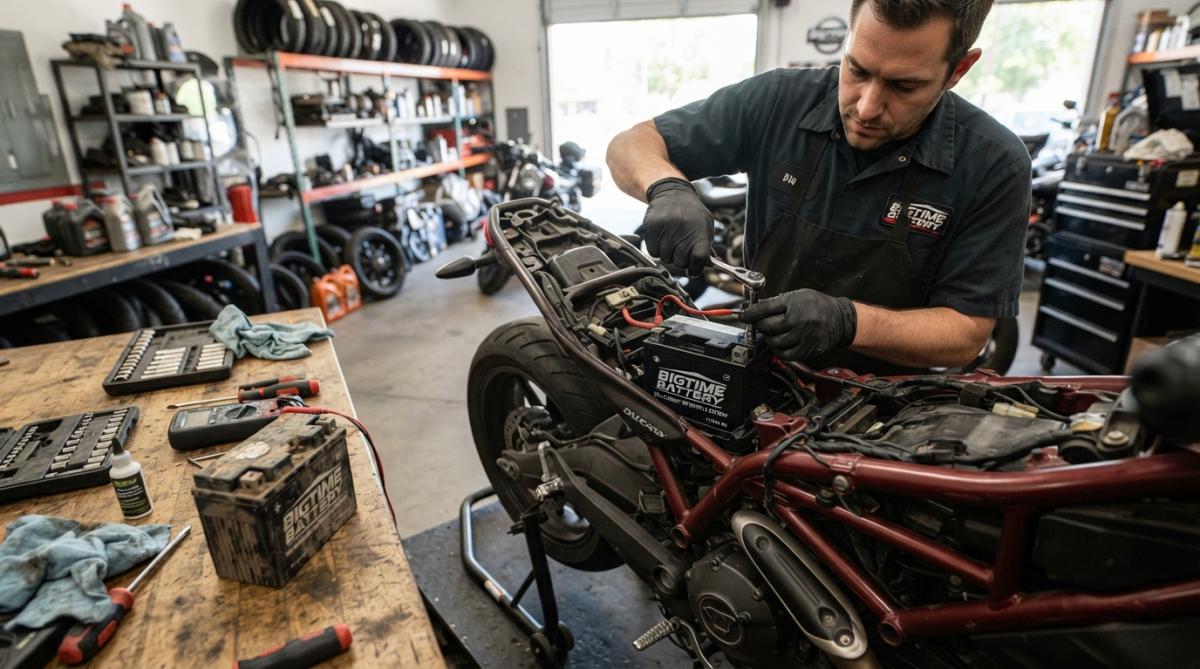
Disconnecting the old battery safely comes first. Locate your motorcycle's battery, typically under the seat or in the side fairing. With the engine off and the key removed, disconnect the negative terminal first. This prevents accidental short circuits if your wrench touches the frame while removing the positive terminal.
Use your wrench to loosen the nut on the negative terminal and remove the cable. Next, disconnect the positive terminal the same way. Never reverse this order. Once both cables are disconnected, remove the battery hold-down bracket and lift the old battery straight up and out of the compartment.
Installing and securing your new battery requires checking polarity before any connections. Place the new battery in the compartment with the positive terminal on the correct side. Connect the positive terminal first, then the negative terminal. Tighten both connections firmly, loose connections cause voltage drop and starting problems.
Reinstall the battery hold-down bracket and tighten it securely. The battery should not move when you push on it.
Preventing sparks and electrical shorts requires attention to detail. Before turning on the ignition, visually inspect both terminal connections. They should be tight and clean, with no corrosion visible. Never leave metal tools on the battery or battery box, a wrench bridging both terminals will create a spark and potentially cause a fire.
Post-Installation Testing and Verification
Your work isn't finished when the battery is installed. Testing confirms the electrical system is working correctly.
Checking voltage and electrical load takes five minutes but catches problems before they become roadside failures. With the engine off, use your multimeter to measure the battery voltage. It should read between 12.4 and 12.8 volts for a fully charged battery.
Start the engine and let it idle for 30 seconds. The voltage should rise to 13.5 to 14.5 volts, indicating the charging system is working. If voltage stays at 12 volts or drops below 12 volts while the engine runs, your alternator or rectifier may be failing.
Turn on the headlight and measure voltage again. A healthy system should maintain at least 13.5 volts even with electrical loads active.
Verifying alternator and charging system function requires one more test. Disconnect the negative battery cable while the engine is running. A healthy alternator will keep the engine running without the battery supplying current. If the engine dies immediately, the alternator isn't generating sufficient voltage. Reconnect the battery immediately after this test.
Best Motorcycle Battery Brands 2026 and Selecting the Right Replacement
Your replacement battery choice affects reliability, lifespan, and long-term costs.
OEM versus aftermarket options present different trade-offs. OEM batteries are guaranteed to fit and work with your motorcycle's electrical system but typically cost more. Aftermarket batteries from reputable manufacturers like Yuasa, Shorai, and Interstate offer similar performance at lower prices. For most riders, an aftermarket battery from a known brand is the better value.
Bigtime Battery stocks both OEM and aftermarket options for virtually every motorcycle model. The team can verify compatibility and answer questions about battery specifications before you order.
Lithium-ion batteries from Shorai and Antigravity are premium options for riders who want maximum performance and minimal weight. They're ideal for track bikes and high-performance motorcycles but overkill for casual street riding.
Cold cranking amps and motorcycle battery lifespan guide your selection. A battery rated for higher CCA will start your bike more reliably in cold weather. Most quality motorcycle batteries last 3 to 5 years with proper maintenance. Lithium batteries can last 5 to 8 years because they don't sulfate like lead-acid batteries.
How to Charge a Motorcycle Battery and Extend Its Life
A properly charged battery starts your bike reliably and lasts longer.
Using a trickle charger and battery tender maintains battery health during storage. A battery tender is an automatic trickle charger that monitors voltage and stops charging when the battery reaches full capacity, then resumes if voltage drops.
Connect the charger to the battery terminals (positive to positive, negative to negative) and plug it in. Leave it connected for 4 to 8 hours for a completely dead battery, or overnight for maintenance charging. For seasonal storage, a battery tender prevents the 15% to 20% monthly charge loss that occurs when a motorcycle sits unused.
Preventing sulfation and deep discharge damage requires understanding how lead-acid batteries degrade. Sulfation occurs when a battery sits in a discharged state for extended periods. Deep discharge, draining a battery below 11 volts, accelerates sulfation. If your bike won't start, charge the battery immediately rather than letting it sit.
Motorcycle Battery Maintenance Tips and Storage Best Practices
Regular maintenance extends battery lifespan and prevents starting problems.
Cleaning corrosion from terminals and cable connections should happen quarterly or whenever you notice white, blue, or green crusty buildup. Disconnect the negative battery cable and use a wire brush to scrub the terminal posts and cable connectors. For stubborn corrosion, mix baking soda with water to create a paste and apply it to the corroded areas. Let it sit for 10 minutes, then scrub again. Rinse with clean water and dry thoroughly before reconnecting.
Apply a thin layer of dielectric grease to the terminals after cleaning. This waterproof coating prevents corrosion from returning.
Maintenance-free battery care is simpler than traditional lead-acid batteries. AGM and lithium batteries don't require fluid checks or terminal maintenance. Check battery voltage monthly during riding season, a healthy battery should maintain 12.4 to 12.8 volts when the engine is off.
Inspect the battery case for cracks or leaks. A damaged battery should be replaced immediately. For winter storage, disconnect the negative battery cable if you won't be riding for more than a month.
Choosing the right replacement battery and installing it correctly ensures your motorcycle starts reliably for years. Bigtime Battery offers OEM and aftermarket batteries for every motorcycle model, with compatibility verification and expert guidance to match you with the right choice. Whether you need a traditional lead-acid battery, a maintenance-free AGM, or a high-performance lithium option, Bigtime Battery's wide selection and competitive pricing make it your one-stop shop for powersport batteries. Order today and get your bike back on the road with confidence.
Frequently Asked Questions
How often should a motorcycle battery be replaced?
Motorcycle battery lifespan typically ranges from 3 to 5 years, depending on riding frequency, climate, and maintenance. Batteries in cold climates or those subjected to deep discharge cycles may fail sooner. If your battery struggles to crank the engine or shows signs of sulfation, replacement is due. Regular voltage testing with a multimeter helps predict failure before it leaves you stranded.
What are the signs that a motorcycle battery needs replacing?
Common warning indicators include slow engine cranking, dim headlights, clicking sounds when turning the ignition, and difficulty starting in cold weather. A multimeter reading below 12.6 volts at rest signals a failing battery. If your battery won't hold a charge after using a trickle charger, or if you notice corrosion buildup on terminals that won't clean off, replacement is necessary. Maintenance-free batteries showing these signs cannot be revived.
What's the difference between AGM and lithium-ion motorcycle batteries?
AGM (Absorbent Glass Mat) and conventional lead-acid batteries are affordable and compatible with older motorcycles, but require occasional maintenance. Lithium-ion smart batteries offer lighter weight, longer lifespan, and superior cold-cranking amps (CCA) performance, ideal for modern powersports. Lithium batteries resist sulfation and deep discharge damage better than lead-acid. However, they cost more upfront and may require a compatible charging system. Check your motorcycle's electrical specifications before upgrading battery types.
How do I properly dispose of my old motorcycle battery?
Lead-acid motorcycle batteries contain toxic electrolyte and are fully recyclable. Many retailers and auto parts stores accept old batteries for recycling at no charge, often offering a core credit toward your new battery purchase. Contact your local hazardous waste facility or battery recycling center for drop-off options. Never throw batteries in the trash, they harm the environment. Some motorcycle shops will dispose of your old battery when you purchase a replacement, so ask about this service when buying.