 how-to
How to Install a Marine Battery Monitor: Step-by-Step
Table of Contents
- Why Install a Marine Battery Monitor
- Marine Battery Monitor Installation Tools You'll Need
- Selecting a Mounting Location and Planning Your Setup
- How to Wire a Battery Shunt for Accurate Current Sensing
- Step-by-Step Installation: Power Supply and Data Connections
- Calibration and Post-Installation Testing
- Troubleshooting Marine Battery Monitors and Common Issues
- Integrating Your Monitor with NMEA 2000 Networks
- Frequently Asked Questions
Last Updated: August 26, 2026
Why Install a Marine Battery Monitor
A marine battery monitor transforms your understanding of boat electrical health. Without real-time data, you're operating blind, most boat owners discover this the hard way when power suddenly fails mid-trip.
The global marine battery market was valued at $1.67 billion in 2025 and is projected to reach $6.11 billion by 2034, growing at a compound annual growth rate of 16.50%, according to Fortune Business Insights' 2026 Marine Battery Market Report. This explosive growth reflects a fundamental shift in how boat owners approach electrical systems.
Here's what most guides miss: voltage readings alone are dangerously unreliable. A resting battery at 12.6 volts might have 50% charge remaining, but under load it could drop to 11.8 volts. For lithium batteries, voltage stays stable until it suddenly collapses, offering zero warning before failure. A proper marine battery monitor provides amperage data, state of charge calculations, and time-to-discharge estimates, information a voltmeter can never provide.
Installing a marine battery monitor yourself saves hundreds in labor costs while giving you complete control over your electrical system. This guide walks you through every step, from tool selection through post-installation testing, with special attention to configuration differences between lead-acid and lithium battery chemistry.
Marine Battery Monitor Installation Tools You'll Need
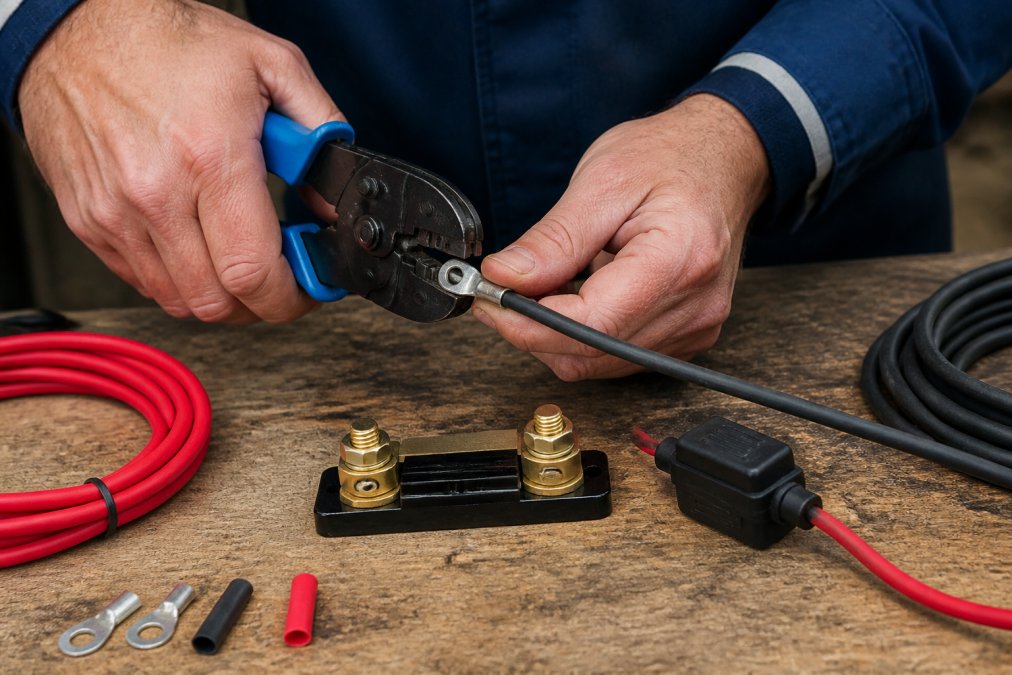
Gather the right tools before starting: a multimeter, wire strippers rated for marine-grade wire, a crimper for terminal lugs, and adjustable wrenches. Don't skip the crimper, twisted connections generate heat and resistance, corrupting your monitor's readings. For fused connections at the battery, you'll need an inline fuse holder rated for appropriate amperage (typically 100-150A) and marine-grade fuses.
The installation kit typically includes the battery monitor display unit, the shunt (the current-sensing component), a data cable, a UTP cable for NMEA 2000 integration if applicable, and terminal lugs pre-sized for your battery posts. You'll also need marine-grade wire (tinned copper, rated for wet environments), cable ties, and adhesive-backed conduit to protect the data cable from chafing and UV damage.
Selecting a Mounting Location and Planning Your Setup
Mount the display where you can see it regularly without climbing into engine compartments. A cabin bulkhead, galley wall, or helm station works well. Avoid direct sunlight exposure and high-vibration areas like engine rooms.
The shunt itself must mount directly on or immediately adjacent to your battery bank's negative terminal. This is non-negotiable for accuracy. The shunt measures current flowing through your electrical circuit by monitoring voltage drop across a precision resistor. If the shunt is located six feet away from the battery on a secondary bus bar, you're measuring only partial current flow, making your state of charge calculations meaningless.
Plan your wiring path before drilling holes or running cables. The power supply wires from the battery to the shunt need a fused connection at the battery to protect against short circuits. The data cable should run through conduit and away from engine compartments and other sources of electromagnetic interference.
How to Wire a Battery Shunt for Accurate Current Sensing
The shunt is a precision resistor that measures voltage drop across a known resistance. By measuring this tiny voltage difference and applying Ohm's law, the monitor calculates current flowing through your battery bank. The shunt must be installed in series with your battery's negative terminal. Current from every device on your boat flows through this shunt before returning to ground.
Understanding Shunt Placement in Your Electrical Circuit
The shunt sits between your battery's negative terminal and your boat's main negative bus bar or electrical ground. Every amp of current flowing through your electrical system passes through the shunt. If you install the shunt on a secondary bus bar serving only part of your boat, you're measuring only that partial load, not your total system current.
Current flows from your battery's positive terminal through your boat's electrical loads, then returns to the negative terminal. The shunt intercepts this return path. When you measure state of charge, the monitor calculates how many amp-hours have flowed through the shunt since the last full charge. If the shunt isn't measuring all your current, the calculation is wrong. A common mistake is installing the shunt on the negative side of a battery switch or disconnect.
Lithium vs. Lead-Acid Configuration Differences
Lithium iron phosphate (LiFePO4) batteries and traditional lead-acid batteries require different monitoring approaches, though the shunt installation process is identical (peer-reviewed research). The difference lies in calibration and the parameters you program into your monitor.
Lead-acid batteries lose capacity as they age. A battery that originally held 200 amp-hours might hold only 160 amp-hours after five years of cycling. Lithium batteries maintain nearly constant capacity throughout their lifespan, simplifying monitoring. However, lithium batteries have different charging profiles. They prefer constant-current charging to a lower voltage threshold (typically 3.2V to 3.65V per cell, or about 12.8V to 14.6V for a 12V pack), while lead-acid batteries prefer constant-voltage charging to a higher threshold (typically 13.8V-14.4V for float/maintenance charging, and up to 14.7V during bulk or absorption charging). Your monitor needs to understand which chemistry you're running to calculate state of charge correctly. marine electronics setup.
Step-by-Step Installation: Power Supply and Data Connections
With your shunt location confirmed and tools assembled, you're ready to begin the physical installation.
Connecting Fused Connections at the Battery
The first connection is always the fused connection at the battery's positive terminal. This fuse protects your entire monitoring system from short-circuit damage.
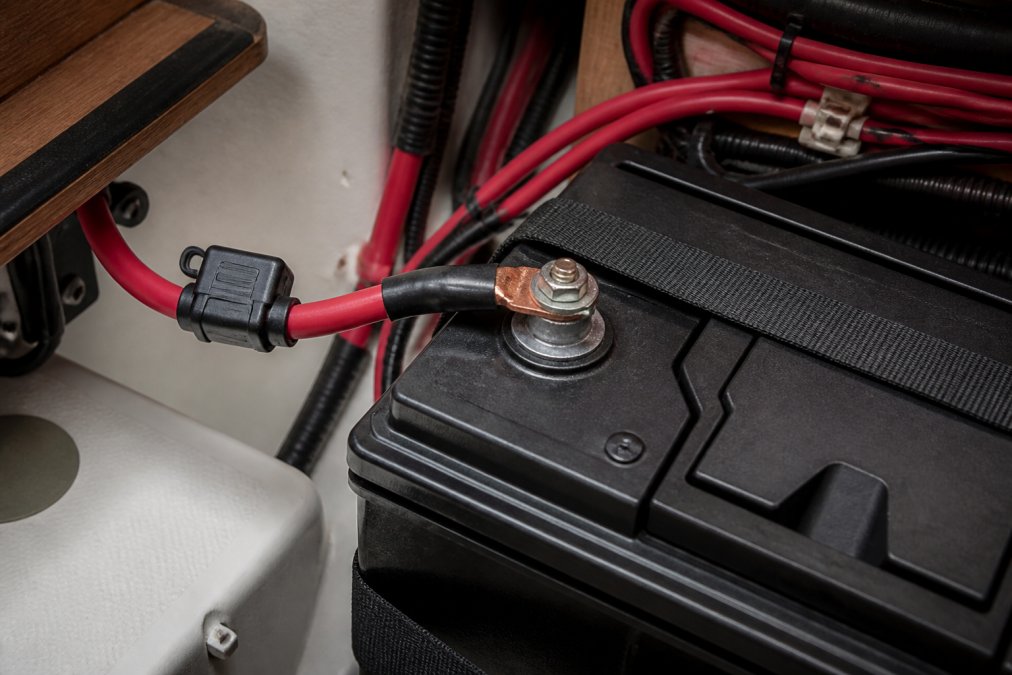
Select an inline fuse holder rated for at least the maximum current your battery bank can deliver. For a typical cruising boat with a 200-300 amp-hour battery bank, a 150A fuse is appropriate. Strip about half an inch of insulation from the end of your marine-grade wire. Using a crimper, attach a terminal lug sized to fit your battery's positive post. Slide the terminal lug onto the battery's positive post and tighten with an adjustable wrench, using two wrenches to prevent the post from rotating.
Run the fused wire from the positive terminal to your shunt's positive input. The inline fuse holder goes in this run, positioned within 18 inches of the battery.
Wiring System Current and Voltage Inputs
The shunt has two critical connections: the current path (through-bolts that carry your entire battery current) and the voltage sensing wire (a thin wire that measures voltage drop across the shunt).
The through-bolts on the shunt are where your high-current connections attach. The positive wire from your fused battery connection attaches to the shunt's positive through-bolt. The negative wire from your boat's main negative bus bar attaches to the shunt's negative through-bolt. These connections must be tight; any resistance here corrupts your current sensing. Use stainless steel bolts and lock washers to prevent corrosion and loosening from vibration.
The voltage sensing wire is a thin, low-current wire (typically 16-18 gauge) that connects from the shunt to the battery monitor display. Route it carefully away from high-current wiring or areas with electromagnetic interference. If you must cross high-current wiring, do so at a 90-degree angle to minimize coupling.
Running the Data Cable and UTP Cable Setup
The data cable connects your shunt to the display unit. Run it through adhesive-backed conduit or marine-grade cable loom to protect it from chafing, UV exposure, and saltwater spray. Secure it with cable ties every 12-18 inches to prevent vibration-induced movement.
At the display unit, connect the data cable according to your monitor's wiring diagram. For NMEA 2000 integration, the UTP cable connects from your monitor to your boat's NMEA 2000 backbone, allowing your battery monitor to broadcast voltage, current, and state of charge data to other electronics like chartplotters and autopilots.
Calibration and Post-Installation Testing
Your monitor won't give accurate readings until it's properly calibrated. Start with a full charge. Run your battery charger or alternator until your battery is completely full. For lead-acid, this means reaching the absorption voltage (typically 14.4-14.8V) and holding it there until charge current drops below 2 amps. For lithium, it means reaching the programmed maximum voltage (typically 3.6V-3.65V per cell, or 14.4V-14.6V for a 12V pack).
Once fully charged, access your monitor's settings menu and select "Calibrate" or "Reset to Full." Next, program the battery bank capacity, the total amp-hour rating of your battery. If you have four 100Ah batteries in parallel, your bank capacity is 400Ah. For lithium batteries, program the battery chemistry setting to ensure the monitor uses the right voltage thresholds for state of charge calculations.
Test your installation by running a known load. Your monitor's amperage display should show positive current (discharging) and the state of charge should decrease gradually. If the amperage is inverted, check your shunt connections for reversed polarity. Let the system run for several hours, then check the amp-hour consumption against your actual power usage to verify accuracy.
Troubleshooting Marine Battery Monitors and Common Issues
Inaccurate state of charge is the most frequent complaint. If your monitor shows 50% charge but your battery seems dead, the culprit is usually incorrect battery capacity programming. A battery that originally held 200 amp-hours might hold only 150 amp-hours after years of cycling. Solution: recalibrate with a full charge and reprogram the actual current capacity.
Erratic amperage readings often indicate a loose connection somewhere in the shunt circuit. Tighten all connections at the shunt, battery terminals, and display unit. If readings remain noisy, check that your voltage sensing wire isn't running alongside high-current power wires. A monitor that won't power on suggests a dead display battery or a blown fuse in the data cable.
Parasitic draws, devices that consume power even when the boat is supposedly idle, are invisible to voltage-only monitoring but obvious with a proper marine battery monitor. If your state of charge drops 5% per day with nothing running, a parasitic draw is killing your battery. Your monitor shows the culprit: a small but constant negative amperage (discharge) even with everything off. Trace that draw to its source, often a radio left on standby, a bilge pump float switch stuck, or an inverter drawing phantom power.
Integrating Your Monitor with NMEA 2000 Networks
Modern marine electronics communicate via NMEA 2000, a standardized digital backbone that allows your battery monitor to share data with chartplotters, autopilots, and other systems. NMEA 2000 uses a twisted-pair UTP cable (similar to Ethernet but marine-rated) that connects all compatible devices in a network.
The integration process is straightforward: connect the UTP cable from your monitor to an open connector on your NMEA 2000 backbone. No software configuration is required; NMEA 2000 is a plug-and-play protocol. Your chartplotter automatically discovers the battery monitor and begins displaying battery data. The benefit is convenience and situational awareness. Instead of glancing at a separate battery monitor display, you see battery status directly on your chartplotter screen.
Installing a marine battery monitor gives you the visibility to manage your electrical system with confidence. You'll catch charging problems before they strand you, understand your actual power consumption, and extend your battery's lifespan by maintaining proper charge cycles. The installation process is straightforward for anyone comfortable with basic electrical work, and the long-term payoff in system reliability and peace of mind is substantial.
Bigtime Battery carries the marine batteries and specialized components you need for a complete installation, with expert guidance on selecting the right monitor for your specific battery chemistry and electrical architecture. Start with a quality monitor and proper calibration, and you'll have years of accurate electrical system monitoring ahead.
=== FAQ ANSWERS (audit these too, same rules) ===
[1] Q: Do you need a shunt for a marine battery monitor to work? A: Yes, a shunt is essential for accurate current measurement. It's an inline resistor placed in your electrical circuit that measures voltage drop across itself, allowing the monitor to calculate amperage and state of charge. Without a shunt, your monitor can only read voltage, which is unreliable for determining actual battery capacity. Voltage readings fluctuate with temperature, load, and battery chemistry, leaving you unable to detect parasitic draws or charging system problems.
[2] Q: Where should the shunt be placed in a marine electrical circuit? A: The shunt must be installed between the negative terminal of your battery bank and the negative busbar or distribution point. This placement allows it to measure all system current flowing through your battery. The shunt's negative terminal connects to the battery negative, while its positive terminal connects to your system's negative distribution. This series connection in your electrical circuit ensures every amp leaving or entering the battery passes through the shunt for measurement. Incorrect placement will result in inaccurate state of charge readings and missed parasitic draws.
[3] Q: How do you hook up a battery monitor to a boat system? A: Start by installing the shunt in series with your negative battery connection. Run the voltage sensing wire from the monitor to the positive battery terminal and ground it to the negative terminal. Connect the data cable (typically UTP cable) from the shunt to the monitor display unit, usually routed through your cabin wall. Secure all connections with terminal lugs and protect high-current connections with inline fuses rated for your system. Finally, calibrate the monitor by entering your battery bank capacity in amp-hours. Power up the system and verify readings match your charger output during a test charge cycle.
[4] Q: What's the difference between lithium and lead-acid monitor configuration? A: Lithium batteries (LiFePO4) require different calibration settings because they maintain relatively stable voltage until suddenly dropping off, offering no warning before failure. Lead-acid batteries show gradual voltage decline as they discharge. When configuring your monitor, select the correct battery chemistry type in settings. Lithium systems may need adjusted state of charge thresholds and alarm points. Additionally, lithium batteries charge faster and to higher voltages, so your monitor's voltage sensing range and amp-hour capacity inputs must reflect lithium specifications. Incorrect chemistry selection causes misrepresented state of charge and missed low-battery warnings.
Frequently Asked Questions
Do you need a shunt for a marine battery monitor to work?
Yes, a shunt is essential for accurate current measurement. It's an inline resistor placed in your electrical circuit that measures voltage drop across itself, allowing the monitor to calculate amperage and state of charge. Without a shunt, your monitor can only read voltage, which is unreliable for determining actual battery capacity. Voltage readings fluctuate with temperature, load, and battery chemistry, leaving you unable to detect parasitic draws or charging system problems.
Where should the shunt be placed in a marine electrical circuit?
The shunt must be installed between the negative terminal of your battery bank and the negative busbar or distribution point. This placement allows it to measure all system current flowing through your battery. The shunt's negative terminal connects to the battery negative, while its positive terminal connects to your system's negative distribution. This series connection in your electrical circuit ensures every amp leaving or entering the battery passes through the shunt for measurement. Incorrect placement will result in inaccurate state of charge readings and missed parasitic draws.
How do you hook up a battery monitor to a boat system?
Start by installing the shunt in series with your negative battery connection. Run the voltage sensing wire from the monitor to the positive battery terminal and ground it to the negative terminal. Connect the data cable (typically UTP cable) from the shunt to the monitor display unit, usually routed through your cabin wall. Secure all connections with terminal lugs and protect high-current connections with inline fuses rated for your system. Finally, calibrate the monitor by entering your battery bank capacity in amp-hours. Power up the system and verify readings match your charger output during a test charge cycle.
What's the difference between lithium and lead-acid monitor configuration?
Lithium batteries (LiFePO4) require different calibration settings because they maintain relatively stable voltage until suddenly dropping off, offering no warning before failure. Lead-acid batteries show gradual voltage decline as they discharge. When configuring your monitor, select the correct battery chemistry type in settings. Lithium systems may need adjusted state of charge thresholds and alarm points. Additionally, lithium batteries charge faster and to higher voltages, so your monitor's voltage sensing range and amp-hour capacity inputs must reflect lithium specifications. Incorrect chemistry selection causes misrepresented state of charge and missed low-battery warnings.