 how-to
How to Recondition Golf Cart Batteries at Home Step by Step
Table of Contents
- Safety Precautions for Handling Lead-Acid Batteries
- Tools and Materials You Will Need
- Visual Inspection: Signs of a Dead vs. Salvageable Battery
- How to Test Golf Cart Battery Voltage with a Multimeter
- Step-by-Step Guide to Recondition Golf Cart Batteries at Home
- When to Replace vs Recondition Golf Cart Batteries
- Post-Reconditioning Maintenance Schedule
- Frequently Asked Questions
Last Updated: September 7, 2026
When a golf cart battery bank loses its charge, most owners assume the only fix is costly replacement. Before spending hundreds on new deep cycle batteries, learn how to recondition golf cart batteries at home step by step. Reconditioning restores lost capacity in lead-acid batteries through cleaning, controlled charging, and desulfation. This guide helps you determine whether your batteries are salvageable and how to revive them safely.
Most batteries fail from sulfation, a chemical reaction where sulfate crystals build up on the battery plates and block the flow of electricity. According to Golf Car Advisor's guidance on battery restoration, adding Epsom salt is a common home remedy, but professional guidance increasingly prioritizes proper charging techniques and desulfation devices over chemical additives. Below, we cover the tools you need, the safety precautions that matter, and the five-step process that gives you the best shot at reviving your pack.
Safety Precautions for Handling Lead-Acid Batteries
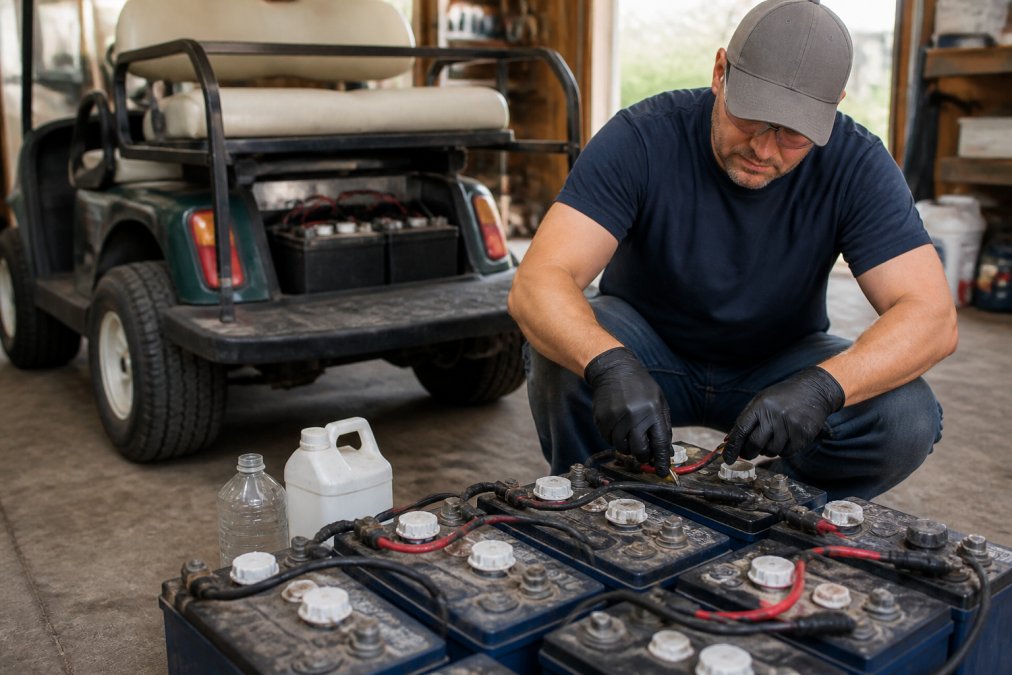
Working with lead-acid batteries means handling sulfuric acid, explosive hydrogen gas, and high electrical current. Safety goggles, acid-resistant gloves, and protective clothing covering arms and legs are non-negotiable. Work in a well-ventilated area away from flames or sparks, since charging produces easily ignited hydrogen gas.
Keep a box of baking soda nearby to neutralize any acid spills on skin, clothing, or the battery case. Remove all metal jewelry before you start, and never place tools across both terminal posts simultaneously, as this creates a short circuit that can weld the tool and cause severe burns. Expert sources like Mentor Golf Carts and Trailers caution that reconditioning is not a universal solution, and individual battery testing determines whether a battery is beyond recovery.
Tools and Materials You Will Need
Assemble everything before you begin. You will need a digital multimeter, a hydrometer, distilled water, baking soda, a wire brush or terminal cleaner, and a charger with an equalization mode. A load tester helps verify capacity after reconditioning.
| Tool | Purpose | When You Use It |
|---|---|---|
| Digital multimeter | Measure voltage per battery | Before and after charging |
| Hydrometer | Check electrolyte specific gravity | After topping off water |
| Distilled water | Refill electrolyte levels | Before charging |
| Wire brush | Clean corrosion from terminals | Step 1 |
| Smart charger | Slow charge and equalization | Steps 3 and 4 |
| Load tester | Verify restored capacity | Step 5 |
Visual Inspection: Signs of a Dead vs. Salvageable Battery
Before investing time in reconditioning, examine each battery for physical damage that makes it unsafe to work on. A cracked case, bulging sides, or corroded terminal posts that crumble when touched signal replacement, not reconditioning. Confirm vent caps are intact and not clogged.
Look for excessive white or blue powder around the terminals, which indicates corrosion that can be cleaned. Professional guidance from Large Battery's restoration guide emphasizes that the primary goal of reconditioning is to restore lost capacity rather than guarantee a return to original factory performance. If the case is swollen or the battery has a sulfur smell when you remove the vent caps, the internal plates may be damaged beyond repair.
How to Test Golf Cart Battery Voltage with a Multimeter
Testing voltage tells you whether a battery has a chance of recovery. A fully charged 6-volt battery reads 6.3 to 6.4 volts; an 8-volt reads 8.4 to 8.5 volts. Set your multimeter to DC voltage, place the red probe on positive and black on negative, and record the reading.
- Below 5.0 volts (6V battery) or 6.5 volts (8V battery): Likely deeply sulfated, but may respond to reconditioning
- Between 5.0 and 6.0 volts: Good candidate for desulfation and slow charging
- Above 6.0 volts but low capacity: Needs a full charge cycle and load test
- Zero volts: A shorted cell or broken internal connection, typically not salvageable
The battery must rest for at least 12 hours after charging to get an accurate reading. A surface charge gives falsely high numbers that drop quickly under load.
Step-by-Step Guide to Recondition Golf Cart Batteries at Home
The complete process takes two to three days because slow charging and equalization require extended time. Do not rush, as fast charging creates heat that warps plates and causes permanent damage.
Before you begin, identify your battery type. These steps apply to flooded lead-acid batteries, which have removable vent caps and are most common in golf carts. If your battery is sealed (no caps) and labeled AGM or gel, do not attempt to open it or equalize it. These batteries require a different maintenance profile and are generally not candidates for home reconditioning. Opening a sealed battery destroys it and voids any warranty.
Step 1: Clean the Terminals and Case
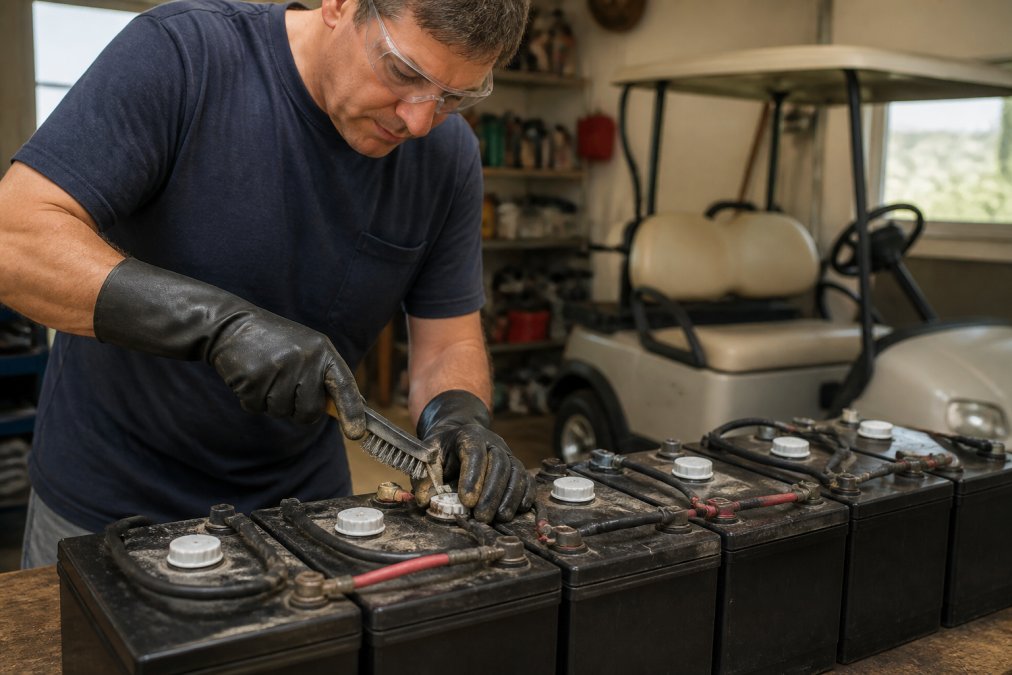
Disconnect batteries starting with the negative cable, then positive. Mix a paste of baking soda and distilled water and apply it to corroded terminals and cable ends with a brush. The paste neutralizes acid corrosion into a rinseable residue. Scrub posts and connectors with a wire brush until they shine, rinse with clean water, and dry completely. A clean connection ensures the charger delivers full current. Reconnect batteries in the correct series configuration, positive to negative, before charging.
Step 2: Check and Top Off Electrolyte Levels
Remove vent caps and inspect electrolyte level in each cell. Fluid should cover the plates, about a quarter inch below the fill well. Add only distilled water, never tap water, as minerals contaminate the electrolyte and reduce battery life. Do not overfill, as electrolyte expands during charging and overflows. Use a hydrometer to check specific gravity, which should read 1.265 to 1.299 for a fully charged battery. A difference over 0.050 between cells indicates a weak cell that may not respond to reconditioning.
Step 3: Perform a Full Slow Charge
Connect your charger and set it to the lowest amperage, typically 10 amps or less for a standard pack. A slow charge fully converts sulfate back into active material without overheating plates. Charging a deeply discharged pack can take 8 to 12 hours or longer. Monitor temperature; if any battery exceeds 125 degrees Fahrenheit, stop and let it cool before resuming. Continue until the charger indicates full charge, then let batteries rest for several hours.
Step 4: Run an Equalization Charge
Equalization is a controlled overcharge that balances cells and breaks down stubborn sulfate crystals. Only use a charger with a dedicated equalization mode, and only on flooded lead-acid batteries, never on sealed AGM or gel batteries, which cannot tolerate higher voltage. Run it for the duration specified by your charger manufacturer, typically 2 to 4 hours. Electrolyte will bubble vigorously, which is normal. Check water levels again after equalization and top off with distilled water as needed.
Step 5: Load Test and Reinstall
After equalization, let batteries rest 12 to 24 hours, then test each individually. A load tester applies a simulated load and measures voltage drop. A healthy 6-volt battery should maintain at least 5.5 volts under load for 15 seconds. If batteries pass, reinstall them and tighten all connections. If one or more fail, replace only the failed units rather than the entire pack, provided the remaining batteries are in good condition.
When to Replace vs Recondition Golf Cart Batteries
Knowing when to replace vs recondition golf cart batteries comes down to age, physical condition, and test results. Batteries older than five years rarely justify reconditioning, since active material has naturally degraded. Batteries with cracked cases, swollen sides, or shorted cells should always be replaced.
Reconditioning works best on neglected batteries, such as a pack left discharged over winter or one with sulfation from chronic undercharging. If the multimeter shows healthy voltage but the cart runs out of power quickly, reconditioning may restore meaningful capacity. When replacement is right, Bigtime Battery carries a wide selection of replacement deep cycle batteries for golf carts, marine use, and specialty applications.
Reconditioning extends the life of a neglected battery pack, but it cannot fix physical damage or restore a battery past its natural lifespan. Test first, recondition only what is salvageable, and replace the rest.
Post-Reconditioning Maintenance Schedule
A reconditioned battery pack needs consistent care to hold onto its restored capacity. Neglect caused the sulfation, so a proactive schedule is the only way to prevent relapse. Here is a practical calendar.
After Every Use (Even Short Trips): Charge the cart immediately. A lead-acid battery left partially discharged begins sulfating within hours; the deeper the discharge, the faster crystals harden. Plug the cart in as soon as you return it to the garage or storage area.
Weekly: If the cart sits unused for more than a few days, check pack voltage with your multimeter. A fully charged 48-volt pack (eight 6-volt batteries) should read around 50.9 to 52.0 volts at rest. If it drops below 48.0 volts, charge immediately to prevent sulfation.
Monthly: Check electrolyte level in each cell of your flooded batteries. Top off with distilled water before charging, not after, because the water level rises during charging. Use a hydrometer to check specific gravity on a sample cell from each battery and record readings. A consistent drop across all cells over several weeks indicates the battery is losing capacity and may need another equalization cycle.
Every 3 Months: Clean terminals and cable connections with a baking soda paste and wire brush. Corrosion adds electrical resistance, reducing charging efficiency and creating heat. After cleaning, apply a thin coat of petroleum jelly to inhibit future corrosion. Retighten connections to the manufacturer's torque specification, typically 90 to 110 inch-pounds for standard 6-volt batteries.
Every 30 to 60 Days (or as needed): Perform an equalization charge if hydrometer readings show a specific gravity variance over 0.030 between cells in the same battery. This controlled overcharge rebalances cells and keeps sulfate crystals from hardening. Do not equalize more often than necessary, as it accelerates grid corrosion and shortens battery life.
Seasonal Considerations: If storing the cart for winter, fully charge the pack, then disconnect the negative cable to prevent parasitic drain. Check voltage monthly and recharge whenever it drops below 48.0 volts. A discharged battery freezes at a much higher temperature than a charged one, which can crack the case and destroy it.
Signs Your Reconditioned Pack Is Failing: Even with perfect maintenance, a reconditioned pack has a finite lifespan. Watch for these warning signs: the cart's runtime drops noticeably, the charger runs longer than usual without reaching full voltage, or white sulfate powder accumulates on the outside of the case. If specific gravity readings continue to fall despite equalization, the active material has degraded and replacement is the only option.
According to Battery Tender's maintenance guidance, extending pack life relies on immediate charging after use, maintaining correct water levels, and keeping terminals and cables clean and tight. Following this schedule typically adds one to two years of service to a reconditioned pack, but it cannot make a battery last forever. When the pack finally fails, proper disposal is essential. Take old batteries to a recycling center that accepts lead-acid batteries; most auto parts stores and battery retailers accept them for free. Never dispose of batteries or the electrolyte solution in household trash or down a drain, as the lead and sulfuric acid are hazardous waste.
Frequently Asked Questions
Does battery reconditioning actually work?
Reconditioning works when the issue is sulfation, which occurs when lead-acid batteries sit discharged for long periods. The process of cleaning, slow charging, and equalization can dissolve sulfate crystals and restore lost capacity. However, it cannot fix physical damage like cracked plates, shorted cells, or severe corrosion. Test each battery's voltage and perform a load test first. If a cell reads below 1.5 volts or fails a load test, replacement is the safer and more reliable option.
How do I know if my golf cart battery is beyond repair?
A battery is likely beyond repair if it fails a load test, has a swollen or cracked case, or shows a voltage difference greater than 0.5 volts between cells in the same battery. If the electrolyte is dark or cloudy, that indicates plate shedding, which reconditioning cannot reverse. Also, if the battery is more than five years old and has been consistently discharged below 50% state of charge, replacement is usually more cost-effective than attempting to recondition it.
Is it safe to recondition lead-acid batteries at home?
Yes, if you follow safety precautions for handling lead-acid batteries. Always work in a well-ventilated area because charging produces hydrogen gas, which is explosive. Wear safety goggles and acid-resistant gloves to protect against sulfuric acid burns. Remove metal jewelry and keep tools away from battery terminals to avoid short circuits. Neutralize any acid spills with a baking soda and water solution. Never attempt to open sealed AGM or gel batteries, since only flooded lead-acid batteries can be safely serviced at home.