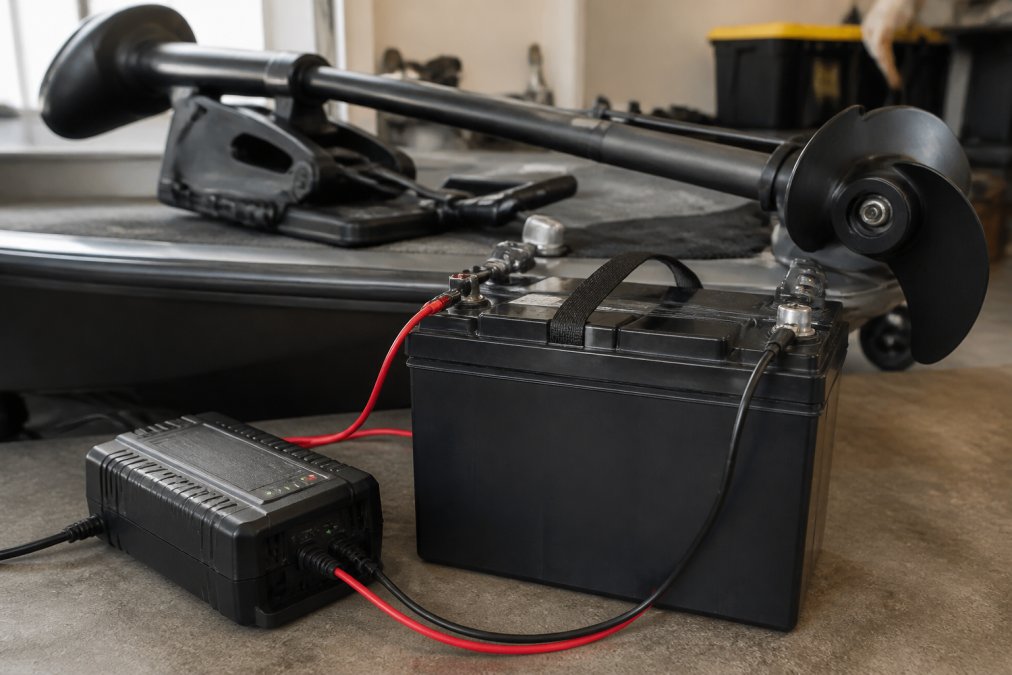
 how-to
How to Charge a Trolling Motor Battery at Home
Table of Contents
- What You Need Before You Start Charging
- How to Charge a Trolling Motor Battery at Home: Step-by-Step
- 12V Deep Cycle Battery Charging Time Explained
- Choosing the Best Marine Battery Charger for Trolling Motor Use
- Trolling Motor Battery Charging Safety Rules
- Common Charging Mistakes and How to Avoid Them
- Frequently Asked Questions
Last Updated: September 11, 2026
What You Need Before You Start Charging
Getting the charge right starts with the right math. According to Battery Tender's angler charging guide, the optimal charger amperage for a trolling motor battery is 10-20% of the battery's amp-hour capacity. That single ratio prevents most of the heat damage and slow-charge frustration owners run into. This guide from Bigtime Battery walks through the full process, from disconnecting terminals to reading a float charge.
Before you touch a charger, confirm three things:
- Battery type: flooded lead-acid, AGM, gel cell, or lithium iron phosphate (LiFePO4)
- System voltage: 12V, 24V, or 36V, which decides whether you charge the bank together or one battery at a time
- Charger compatibility: a smart charger with a charging profile matched to your chemistry
You'll also want safety glasses, a wrench, and a ventilated space.
How to Charge a Trolling Motor Battery at Home: Step-by-Step
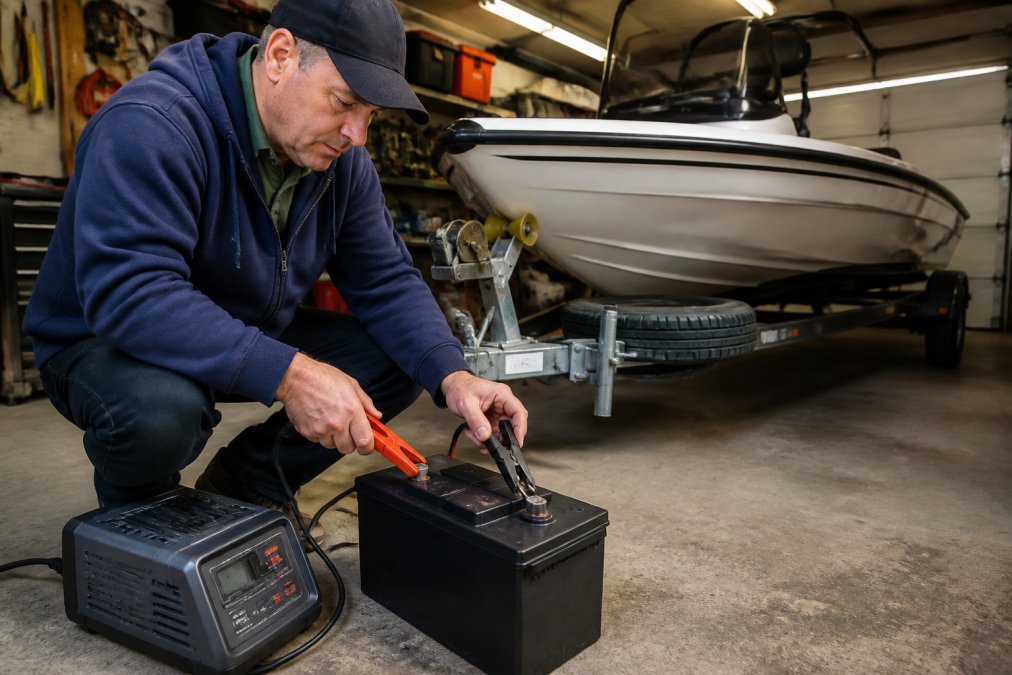
Charging a trolling motor battery at home takes three steps: disconnect and inspect, match charger voltage to the system, then connect and monitor until the charger reaches float mode. Most 12V deep cycle batteries recharge in 5-12 hours.
Step 1: Disconnect and Inspect the Battery
Pull the negative terminal first, then the positive. Check for corrosion, cracks, and swelling, which signals a battery near the end of its cycle life. Confirm electrolyte levels on flooded lead-acid units before charging, never after.
Step 2: Match Charger Voltage to Your Battery System
Per Lithium Hub's beginner charging guide, a single 12V battery needs a 12V-compatible charger, while a 24V bank requires either a 24V charger or individual 12V charging. Mismatched voltage is the fastest way to damage a battery bank.
Step 3: Connect, Charge, and Monitor
Clamp the positive lead to the positive terminal, then the negative to the negative. Plug in and watch the display cycle through bulk, absorption, and float phases. You're done when the charger holds float mode.
12V Deep Cycle Battery Charging Time Explained
Charging time follows a simple formula: (battery amp-hours × depth of discharge) ÷ charger amps = approximate hours. A 100Ah battery at 50% discharge on a 10-amp charger needs roughly 5 hours. That formula is a planning tool, not a stopwatch, real-world time stretches when the battery is deeply discharged, temperatures drop, or the charger tapers into absorption and float.
What Actually Happens in Each Charging Stage
A multi-stage charger moves through three phases, each with a different job:
| Stage | What the Charger Does | Typical Voltage (12V Flooded/AGM) | Typical Voltage (12V LiFePO4) |
|---|---|---|---|
| Bulk | Pushes full rated current until the battery reaches the absorption voltage setpoint | Climbs toward 14.4-14.8V | Climbs toward 14.2-14.6V |
| Absorption | Holds voltage steady while current tapers down | Held at 14.4-14.8V | Held at 14.2-14.6V |
| Float | Drops to a maintenance voltage to offset self-discharge | 13.2-13.6V | 13.4-13.6V (or charger may stop entirely) |
Those voltage windows are why a "12V charger" isn't automatically the right charger. A lead-acid profile holding absorption at 14.6V will overcharge some lithium packs, and a lithium profile stopping at 14.2V leaves a flooded battery chronically undercharged. Match the profile to the chemistry on the label.
Why the Formula Underestimates Real Charge Time
Lead-acid batteries accept current fastest during bulk charging and slow dramatically near full charge, the last 20% can take as long as the first 80%. That's why a 100Ah battery at 50% discharge often finishes closer to 7-8 hours on a 10-amp charger, not 5.
Lithium iron phosphate accepts near-full current almost to the top of its range, so charge time tracks the formula more closely, but only if the charger's lithium profile is active. On a lead-acid setting, a LiFePO4 battery trips into float early and sits at roughly 80-90% state of charge.
When a Deeply Discharged Battery Won't Trigger the Charger
A smart charger reads voltage before committing to a charge profile. If a battery has sat discharged for weeks, its resting voltage may fall below the charger's threshold, often around 8-10V on a 12V lead-acid unit, and the charger refuses to start, flashing an error.
A common recovery pattern:
- Confirm the battery isn't damaged. Swollen cases, cracked housings, or a sulfur/rotten-egg smell mean the battery is done. Do not attempt recovery.
- Check resting voltage with a multimeter. If it reads below the charger's minimum, the charger isn't broken, the battery is just too low to be recognized.
- Use a manual or "repair" mode if your charger has one. Many multi-stage units include a forced low-voltage wake-up mode specifically for this situation.
- As a last resort, parallel-tie a known-good 12V battery to the dead one (positive to positive, negative to negative) for 15-30 minutes, then disconnect and immediately place the recovered battery on the charger. The brief parallel connection raises the terminal voltage enough for the smart charger to recognize it.
- Monitor the first hour closely. A battery that was deeply discharged can heat up faster than a healthy one. If it gets noticeably warm to the touch, stop and have it load-tested.
If a battery refuses to accept charge after two attempts, it has likely sulfated past recovery. Replacement is the practical answer.
A Realistic Time Budget by System Voltage
For a 24V or 36V bank, the same formula applies but the amp-hour figure is the bank's total capacity, and the charger must be rated for the bank voltage. Charging a 24V bank with a single 12V charger means charging each battery individually, two 100Ah batteries at 50% discharge, charged individually on a 10-amp charger, take about 10 hours of combined time, not 5.
maintain fishing gear.Choosing the Best Marine Battery Charger for Trolling Motor Use
The best marine battery charger for a trolling motor is a smart, multi-stage unit rated at 10-20% of your battery's amp-hour capacity with a charging profile for your specific chemistry. But "smart charger" is a category, not a specification, the settings inside determine whether your battery lasts three seasons or six.
Chemistry-Specific Charger Settings
Here's what those profiles look like in practice. Use these as a starting reference and confirm against your battery manufacturer's spec sheet, the numbers below are typical, not universal.
| Chemistry | Absorption Voltage (12V) | Float Voltage (12V) | Recommended Charge Current | Notes |
|---|---|---|---|---|
| Flooded lead-acid | 14.4-14.8V | 13.2-13.6V | 10-15% of Ah | Requires periodic equalization; check water levels |
| AGM | 14.4-14.7V | 13.2-13.6V | 15-20% of Ah | Accepts higher current than flooded; no water to add |
| Gel | 14.0-14.2V | 13.2-13.4V | 10% of Ah max | Lower absorption voltage than AGM; overcharging damages gel |
| LiFePO4 | 14.2-14.6V | 13.4-13.6V | 20-50% of Ah | BMS handles cell balancing; charger may stop entirely at full |
Two settings cause the most damage when wrong. A gel profile on an AGM battery leaves it chronically undercharged, accelerating sulfation. A flooded or AGM profile on a LiFePO4 battery pushes voltage above what the management system wants and can trip a protective shutdown mid-charge. If your charger only has "lead-acid" and "lithium" settings, confirm which lead-acid sub-type it defaults to.
Onboard vs. Portable: The Wiring Trade-Off
An onboard charger is permanently mounted and wired directly to each battery's terminals; a portable charger travels with you and connects via alligator clips or a quick-connect plug. The choice comes down to how often you charge and where the boat lives.
- Onboard chargers are the better fit if the boat stays on a trailer near an outlet. You run a single shore-power cord, plug in, and the charger manages each battery independently. Multi-bank onboard chargers (2-bank, 3-bank, 4-bank) charge each battery separately, which is essential for 24V and 36V systems wired in series.
- Portable chargers make more sense if the boat is stored away from power or if you pull batteries for winter. They're cheaper and more flexible, but you charge one battery at a time unless you buy a multi-bank unit.
A quick-connect pigtail installed on each battery terminal is the middle ground. You leave the pigtail attached, and the portable charger plugs in without alligator clips. Anglers on MicroSkiff Forums report this as one of the simplest upgrades for a trolling motor setup.
Wiring a 24V or 36V Bank: Series vs. Parallel
The rule is simple:
- Series connections add voltage, keep amp-hours the same. Two 12V 100Ah batteries in series make a 24V 100Ah bank. Positive of battery 1 to negative of battery 2; the open positive and negative become your 24V output.
- Parallel connections add amp-hours, keep voltage the same. Two 12V 100Ah batteries in parallel make a 12V 200Ah bank. Positive to positive, negative to negative.
- Series-parallel combines both. Four 12V 100Ah batteries wired as two series pairs, then those pairs in parallel, make a 24V 200Ah bank.
For 36V, three 12V batteries go in series; for 48V, four. In every series configuration, batteries must share the same chemistry, age, and amp-hour rating. Mixing old and new causes the older battery to overcharge and the newer to undercharge, a failure pattern that shows up within a season.
Integrating Solar Charging with Your Trolling Motor Bank
If your boat sits on a mooring or in a slip without shore power, a solar panel plus a charge controller can keep the bank topped off between trips, but the controller must match the bank voltage and chemistry.
- Panel wattage: A common rule of thumb is 10-20 watts of panel per 100Ah of bank capacity for maintenance charging. A 100Ah 12V bank pairs with a 20-40W panel; a 24V 200Ah bank needs roughly 80-160W.
- Charge controller: Use an MPPT controller for anything above a small trickle panel. MPPT controllers convert excess panel voltage into usable charging current, which matters on cloudy days and in partial shade. PWM controllers are cheaper but waste the voltage difference as heat.
- Controller settings: Set the controller's absorption and float voltages to match your battery chemistry using the table above. Most MPPT controllers ship with a lead-acid default; if you're running LiFePO4, change the profile before connecting the bank.
- Wiring order: Connect the controller to the battery bank first, then the solar panel to the controller. Reversing this order can damage the controller.
A solar setup won't replace a multi-stage shore charger for a deeply discharged bank, it's a maintenance tool, not a recovery tool, but it keeps a stored boat's batteries full between trips and eliminates hauling batteries home.
A Note on Charger Amperage
Bigger isn't automatically better. A charger rated at 20% of the bank's amp-hour capacity recharges faster than a 10% charger, but generates more heat and, on flooded lead-acid, more gassing. For daily home charging, 10-15% of amp-hour capacity is the sweet spot; reserve the higher end for lithium, which handles higher current without the same heat penalty.
If you're unsure what your battery needs, the team at Bigtime Battery can help match a charger to your setup.
Trolling Motor Battery Charging Safety Rules
Trolling motor battery charging safety comes down to four rules: ventilate the space, verify polarity before connecting, keep sparks away from lead-acid batteries, and never charge a damaged or frozen unit.
- Ventilation: lead-acid batteries release hydrogen gas during charging, which is explosive in a sealed space
- Polarity: reversed alligator clips can cause a short circuit and destroy the charger
- Temperature: charge above freezing, and let a hot battery cool first
- Inspection: cracked cases or swollen cells mean the battery is done, not chargeable
One contrarian point worth stating plainly: charging trolling motor batteries off the outboard alternator is not a substitute for a dedicated charger. Standard practice, per Minn Kota and Victron community guidance, is a compatible multi-stage charger for proper battery health.
Common Charging Mistakes and How to Avoid Them
The most expensive charging mistakes are overcharging, undercharging, and skipping maintenance between trips. Each shortens cycle life differently.
| Mistake | Fix | Impact |
|---|---|---|
| Overcharging | Use a smart charger with float mode | Prevents heat damage and sulfation |
| Undercharging | Charge to full after every trip | Avoids capacity loss over time |
| Storing discharged | Top off before storage | Preserves state of charge |
| Ignoring terminals | Clean and inspect monthly | Prevents resistance and corrosion |
| Wrong chemistry setting | Match charging profile to battery | Extends cycle life |
A practical upgrade many owners overlook: swapping heavy flooded lead-acid batteries for lithium iron phosphate units and installing an onboard charger. One YouTube build documented this exact switch, reducing overall battery weight and modernizing the charging system for a trolling motor setup (lithium trolling motor installation).
Frequently Asked Questions
How long does it take to charge a trolling motor battery at home?
Charging time depends on your battery's amp-hour capacity and depth of discharge. Use the formula: (Battery Ah × depth of discharge) ÷ charger amps = approximate hours. For example, a 100Ah battery discharged to 50% charged with a 10-amp charger takes roughly 5 hours. Most deep cycle batteries reach full charge within 4 to 10 hours using a properly sized charger.
Can I charge a trolling motor battery with a regular car charger?
A standard car charger can work in an emergency, but it is not ideal for deep cycle marine batteries. Car chargers often lack the multi-stage charging profile (bulk, absorption, float) that deep cycle batteries need. Using one regularly can cause undercharging or overcharging, which shortens battery life. A smart charger designed for marine batteries delivers the correct charging profile for your battery's chemistry.
Is it safe to leave a trolling motor battery on the charger overnight?
Yes, if you use a smart charger with automatic float mode. Smart chargers reduce current to a maintenance level once the battery reaches full charge, preventing overcharging. Avoid leaving a basic trickle charger or manual charger connected overnight, because those can overcharge and damage the battery. Always charge in a well-ventilated area away from sparks or open flames.
Can I use a solar panel to charge my trolling motor battery at home?
Yes. A solar panel paired with a charge controller can maintain your trolling motor battery at home, especially for storage maintenance. Match the panel's output to your battery's voltage and use a controller to prevent overcharging. Solar charging is slower than a plug-in charger, so it works best as a maintenance method rather than a full recharge after a long day on the water.
Charging a trolling motor battery at home isn't complicated once you match amperage, voltage, and chemistry correctly. The hard part is sourcing a battery that holds up to repeated deep discharges. Bigtime Battery stocks marine, deep cycle, and specialty replacement batteries with competitive pricing and a selection built for real-world use. Get started with Bigtime Battery and find the reliable power solution your boat, cart, or equipment needs.